
WoW Forever Protection Warrior Build Guide
Build a WoW Forever Protection Warrior from 1–30 with current talents, trainer priorities, tank gear, stats, professions, macros, and solo and dungeon rotations.
Protection Warrior is the most deliberate way to level a Warrior in WoW Forever. It is slower than swinging a two-hander through every outdoor quest, but it gives dungeon groups a stable shield tank with real interrupts, strong emergency tools, and enough threat control to recover a messy pull.
This route uses Blizzard’s October 1 beta notes and the official Warrior class deep dive. The beta is still moving. If the live client changes a trainer level, talent connection, or item, trust the client first.
The short version
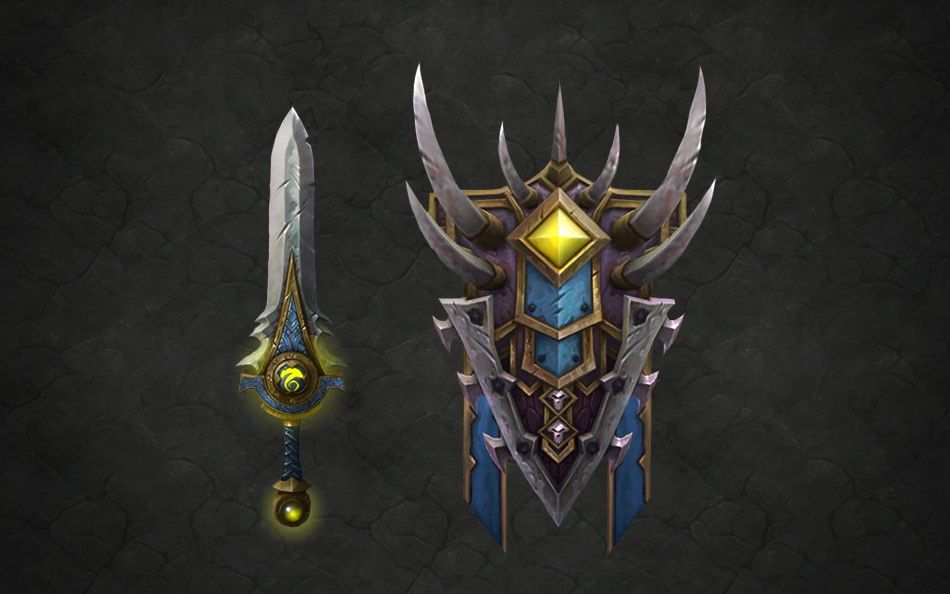
- Carry two weapon sets. Use a two-hander for ordinary solo quests and a one-hander plus shield for dungeons, elites, and dangerous pulls.
- Tank in Defensive Stance. Vanguard at 26 removes the awkward stance swap from Charge.
- Build threat across the whole pack. Thunder Clap and Demoralizing Shout help, but tab-targeted Sunder Armor and Revenge do the real holding work.
- Spend Rage before using Heroic Strike or Cleave. They are overflow buttons. Starving Sunder, Revenge, Shield Block, or an interrupt for them is a bad trade.
- Taunt fixes a lost target; it does not build a lead. Follow it with Sunder Armor or Revenge so the enemy stays with you.
What changed in the October 1 beta build
Older Protection routes are already stale. Toughness was removed, Improved Bloodrage moved to row one, Anticipation moved to row two, Improved Revenge moved to row two, Improved Disarm moved to row three, and Improved Shield Bash moved to row four. Blizzard also raised the extra Rage from critical basic attacks to 100% and moved Berserker Rage to level 30.
The route below follows that current layout and reaches Vanguard at 26 before finishing Defiance at 30. It does not spend points in the removed Toughness talent.
Trainer checklist from levels 1–30
Trainer ranks can be expensive. Buy the tanking kit first: Defensive Stance, Taunt, Bloodrage, Sunder Armor, Shield Bash, Revenge, Demoralizing Shout, Shield Block, Thunder Clap ranks, Challenging Shout, and Shield Wall. After every visit, check that your action bars use the newest rank.
| Level | Train | How it fits |
|---|---|---|
| 1–3 | Heroic Strike; Battle Shout | Keep Battle Shout active; use Heroic Strike only when Rage is available. |
| 4–5 | Charge; Rend | Charge starts normal outdoor pulls. Rend is worthwhile only when the target will live long enough. |
| 6–7 | Thunder Clap | Your first multi-target control tool; Forever allows it in Defensive Stance. |
| 8–9 | Hamstring; Heroic Strike upgrade | Hamstring stops runners and makes outdoor disengages safer. |
| 10–11 | Defensive Stance quest; Taunt; Bloodrage; Sunder Armor | This is the tanking kit. Complete the stance quest before queueing as a tank. |
| 12–13 | Shield Bash; Overpower; Battle Shout upgrade | Shield Bash is the important dungeon purchase. |
| 14–15 | Revenge; Demoralizing Shout; Tactical Mastery | Forever teaches Tactical Mastery at 14 so stance changes retain up to 10 Rage. |
| 16–17 | Shield Block; Mocking Blow; Heroic Strike upgrade | Shield Block enables reliable Revenge windows and smooths physical damage. |
| 18–19 | Disarm; Battle Shout upgrade | Disarm dangerous weapon users; skip it against creatures that do not use weapons. |
| 20–21 | Victory Rush; Cleave; Retaliation; Thunder Clap upgrade | Victory Rush becomes available after a qualifying kill and heals 10% maximum health. |
| 22–23 | Execute; Intimidating Shout; Sunder Armor upgrade | Execute finishes enemies; Intimidating Shout is an emergency reset, not routine AoE. |
| 24–25 | Demoralizing Shout and Heroic Strike upgrades | Keep current ranks on the bar after every trainer visit. |
| 26–27 | Challenging Shout; Mocking Blow upgrade | Challenging Shout buys recovery time when a full pack breaks loose. |
| 28–29 | Shield Wall; Thunder Clap and Execute upgrades | Shield Wall is a planned survival cooldown, not a post-death apology. |
| 30 | Berserker Stance quest; Berserker Rage; Intercept; Slam; Cleave upgrade | Berserker Rage moved to level 30 in the October 1 beta build. |
Protection talent route from levels 10–30
Spend one point per level. This is a shield-tanking route for mixed leveling and dungeons, not a raid build forced into a level-30 beta.
| Level | Spend this point | Reason |
|---|---|---|
| 10 | Improved Bloodrage 1/2 | A stronger opener when a pull starts dry. |
| 11 | Improved Bloodrage 2/2 | Completes the early Rage tool. |
| 12 | Shield Specialization 1/5 | Blocks can start returning Rage. |
| 13 | Shield Specialization 2/5 | More reliable block value. |
| 14 | Shield Specialization 3/5 | Continue the shield path. |
| 15 | Shield Specialization 4/5 | Continue the shield path. |
| 16 | Shield Specialization 5/5 | Completes the core shield talent. |
| 17 | Anticipation 1/5 | Adds Defense skill. |
| 18 | Anticipation 2/5 | Adds Defense skill. |
| 19 | Anticipation 3/5 | Adds Defense skill. |
| 20 | Anticipation 4/5 | Adds Defense skill. |
| 21 | Anticipation 5/5 | Completes the defensive foundation. |
| 22 | Improved Revenge 1/3 | Adds damage to a frequent tanking button. |
| 23 | Improved Revenge 2/3 | Continue toward Last Stand. |
| 24 | Last Stand 1/1 | Your first dedicated emergency health cooldown. |
| 25 | Defiance 1/5 | Starts the threat multiplier while a shield is equipped. |
| 26 | Vanguard 1/1 | Lets Charge work in Defensive Stance. |
| 27 | Defiance 2/5 | More reliable threat. |
| 28 | Defiance 3/5 | More reliable threat. |
| 29 | Defiance 4/5 | More reliable threat. |
| 30 | Defiance 5/5 | Completes the level-cap threat package. |
Stat priority
For dungeon tanking
Weapon DPS and current weapon skill > Armor > Stamina > Strength or Attack Power > Agility > Defense > everything else.
- Weapon damage matters because threat still begins with landing attacks. Level the weapon skill before walking into a dungeon with a new weapon type.
- Armor and Stamina are dependable at every pull size. Do not trade a large amount of either for a tiny conditional bonus.
- Strength and Attack Power improve damage and threat. Agility adds some crit and avoidance, but should not replace clear armor and health gains.
- Defense is useful, but level 30 gear does not offer enough to build the whole character around it. Take good Defense pieces; do not wear weak armor merely because the stat is printed on it.
- Shield Block Value reduces blocked damage. Shield Slam sits beyond this level cap, so block value is defensive rather than a major damage stat here.
For solo leveling
Weapon DPS > Strength or Attack Power > Stamina > Agility > Armor. A meaningful two-handed weapon upgrade usually saves more time than a small armor upgrade. Swap back to the shield set when the pull becomes dangerous.
Practical level-30 best-in-slot targets
There is no honest final BiS list yet. The October 1 build added the Excavation Site dungeon for levels 26–31, but Blizzard has not published its complete loot table. The targets below are dependable pre-cap anchors from established content. Compare every one against Excavation Site, Scarlet Monastery, Razorfen Downs, and early Uldaman drops in the current beta.
| Slot | Practical target | Rule |
|---|---|---|
| Main hand | Butcher’s Slicer from Razorfen Kraul | Use the highest-DPS one-hander you can obtain; faster weapons make target switching feel responsive. |
| Shield | Commander’s Crest from Shadowfang Keep | Replace it with any beta shield offering clearly higher armor, block, and Stamina. |
| Head | Tusken Helm from Razorfen Kraul | A strong pre-cap mail target while testing newer level-30 drops. |
| Shoulders | Sparkleshell Mantle from Blackfathom Deeps | A practical mail anchor, not a reason to ignore a stronger beta item. |
| Legs | Triprunner Dungarees from the Gnomeregan quest line | Useful mixed defensive stats for Alliance characters. |
| Ring | Seal of Wrynn from the Alliance quest chain | A strong Alliance ring; Horde should take the best Stamina and Strength alternative available. |
| Every other slot | Highest-armor mail with Stamina and useful Strength | At 30, a real armor and health upgrade beats a famous item with worse totals. |
Do not delay level 30 waiting for one dungeon drop. A full set of sensible mail, a current one-hander, and a high-armor shield is enough to begin testing cap dungeons. Update the list after the beta loot tables settle.
Recommended professions
| Profession | Why it works |
|---|---|
| Mining + Blacksmithing | The self-sufficient tank pair. Mining supplies ore; Blacksmithing makes weapons, armor, sharpening stones, and utility items. |
| Mining + Engineering | The dungeon-control alternative. Bombs add ranged pulls, stuns, and emergency AoE control. |
| First Aid | Bandage between pulls so the healer drinks less and the group moves faster. |
| Cooking | Use current food buffs and keep inexpensive recovery food in the bag. |
Mining and Blacksmithing is the safest recommendation for a first Warrior. Mining and Engineering is stronger if dungeon utility matters more than making your own armor. Do not let either profession drain the silver needed for trainer skills and weapon upgrades.
Ability priority at a glance
Read each strip from left to right. These are spending priorities after the pull has started, not a fixed sequence that ignores threat, incoming damage, or interrupts.
Single-target tanking
Multi-target packs
Interrupt and recovery priority
Shield Bash, Taunt, and Challenging Shout are conditional tools. Their placement does not mean they should be used on cooldown. Press them when the stated problem exists, then rebuild threat with Revenge or Sunder Armor.
Open-world single-target priority
- Use Battle Stance and Charge with your two-hander. At 26, Vanguard also lets a shield build Charge in Defensive Stance.
- Keep Battle Shout active.
- Apply Rend only when the enemy will live long enough for it to tick.
- Use Sunder Armor early against sturdy targets. One or two applications are normally enough while leveling.
- Use Heroic Strike only with excess Rage. Normal attacks are needed to keep generating Rage.
- Use Victory Rush after a qualifying kill from level 20. Its 10% maximum-health heal reduces downtime between enemies.
- Swap to Defensive Stance and your shield for elites or a bad multi-pull. Shield Block, Revenge, Disarm, and Last Stand turn a risky fight into a controlled one.
Dungeon single-target priority
- Start in Defensive Stance with a one-hander and shield.
- Charge from level 26 with Vanguard, or line-of-sight pull before then. Do not drag the group into the next pack for a prettier opener.
- Use Bloodrage after contact when you need opening Rage.
- Sunder Armor first, then use Revenge whenever it lights up.
- Use Shield Block against meaningful physical swings. It smooths damage and helps create Revenge opportunities.
- Use Shield Bash on the dangerous cast. Damage prevented is worth more than a small threat gain.
- Use Heroic Strike only when core abilities are funded.
- If the target leaves, Taunt and immediately follow with Sunder Armor or Revenge.
Dungeon multi-target priority
- Mark a skull and ask the group to attack it. Threat is easier when five players agree which enemy should die.
- Open with Thunder Clap and Demoralizing Shout. Thunder Clap’s Forever threat was reduced to account for Defensive Stance, so it is not enough by itself.
- Tab through the pack with Sunder Armor and Revenge. Give extra attention to the healer’s target and any enemy being hit early.
- Use Cleave only with excess Rage. The current beta has a known queueing issue around Heroic Strike and Cleave, so do not hammer the key.
- Use Challenging Shout when the entire pack breaks loose. It creates a recovery window; it does not replace rebuilding threat.
Cooldowns and emergency recovery
- Last Stand: Use it before the next heavy hit, then tell the healer the extra health is temporary.
- Shield Wall: Use it for predictable boss damage, a dangerous overpull, or when the healer needs time. Forever no longer links its cooldown to Retaliation and Recklessness.
- Disarm: Excellent against weapon-using enemies and useless against enemies with nothing to disarm.
- Intimidating Shout: A last-resort reset. Fear can pull additional enemies, so understand the room before pressing it.
- Retaliation: Strong when several melee enemies are committed to you, but position the pack safely first.
- Health potion and bandage: Keep both ready. Bandage between pulls; potion during a fight.
Threat, Rage, and pull pacing
Forever calculates Rage from damage taken as if you had 50% damage reduction, so better armor no longer punishes Rage generation as harshly. Basic-attack criticals also generate 100% extra Rage in the October 1 build. That helps, but Rage still disappears when a group pauses too long or another player opens before contact.
- Move while the healer drinks, but do not pull until they are ready.
- Use line of sight on caster packs. Bring enemies to the group instead of fighting in the doorway.
- Do not spend the last Rage on Heroic Strike as a target dies. Carrying Rage into the next enemy is often more valuable.
- Taunt the mob that matters. A loose caster hitting the healer is more urgent than a nearly dead enemy chasing a plate wearer.
Useful Protection Warrior macros
Replace the sample weapon names with your own items. Test every macro after a major beta patch before trusting it in a dungeon.
Defensive Stance and tank weapons
#showtooltip Defensive Stance
/equipslot 16 YOUR ONE-HAND WEAPON
/equipslot 17 YOUR SHIELD
/cast Defensive Stance
Battle Stance and two-hander
#showtooltip Battle Stance
/equipslot 16 YOUR TWO-HAND WEAPON
/cast Battle Stance
Mouseover Taunt
#showtooltip Taunt
/cast [@mouseover,harm,nodead][] Taunt
Stop and interrupt with a shield
#showtooltip Shield Bash
/stopcasting
/equipslot 17 YOUR SHIELD
/cast Shield Bash
Sunder Armor and start attacking
#showtooltip Sunder Armor
/startattack
/cast Sunder Armor
Emergency Shield Wall setup
#showtooltip Shield Wall
/equipslot 16 YOUR ONE-HAND WEAPON
/equipslot 17 YOUR SHIELD
/cast Defensive Stance
/cast Shield Wall
A stance change can consume the first press because of the global cooldown. Treat the Shield Wall macro as setup plus activation and be ready to press it again.
Level-30 dungeon checklist
- One current one-hander, one high-armor shield, and a leveled weapon skill.
- Defensive Stance, Taunt, Revenge, Shield Block, Shield Bash, Challenging Shout, Last Stand, and Shield Wall on reachable keys.
- Current Battle Shout, Thunder Clap, Demoralizing Shout, Sunder Armor, and Heroic Strike ranks on the bar.
- Food, bandages, health potions, repair money, and enough bag space for drops.
- A two-hander for solo travel between dungeons.
- A simple skull mark and a plan for the first dangerous caster.
At the current cap, the available list includes the Excavation Site at 26–31, Razorfen Downs from 25, Uldaman from 30, and the earlier leveling dungeons. Start with content your gear can support instead of treating the minimum level as a guarantee that every pull will be comfortable.
Official sources and beta caveat
Blizzard’s Warrior class deep dive documents the Forever Rage rules, Tactical Mastery at 14, Victory Rush at 20, Thunder Clap in Defensive Stance, the independent major cooldowns, and the rebuilt Protection talents. The October 1 beta notes provide the current talent moves, level-30 cap, dungeon access, critical-hit Rage change, and known queueing issue. Blizzard’s Warrior page supports the class’s shield-tank role and equipment identity.
The talent order, trainer priorities, gear targets, profession pairing, rotations, macros, and dungeon rules are Game Pelt recommendations for the current beta. Blizzard can change any of them before release. Check the live trainer, talent tree, tooltips, and dungeon loot before spending limited gold.