
Which Control Resonant Choices Make the First Hours Easier?
Eight early Control Resonant checks for Build Power, ability choices, damage types, traversal unlocks, health pickups and Assist Mode.
Before retrying a difficult Control Resonant fight, open Loadout and check Stats & Effects. The Build Power number there gives you something useful to compare with the enemy's Power. If the gap is large, another attempt with the same unspent upgrades may solve very little.
That check is one of eight habits worth learning early. The others concern how you spend Power, choose new abilities, and explore Manhattan without walking past permanent improvements. Start with the fight that is giving you trouble, then check what you left unfinished outside it.
When a fight takes too long
1. Check Build Power before another retry
Compare your Build Power with the number beside the enemy's health. Weapon forms, talents, and core health and Power upgrades contribute to your overall development. Visit the Gap outside combat and review the upgrades you can actually afford before assuming the problem is entirely your timing.
The number is a warning, not a promise that a higher value makes every encounter easy. You still need to dodge and use the right attacks. It does help distinguish a difficult enemy from a fight you entered with several improvements sitting unused.
2. Spend abilities between melee attacks
Melee hits restore the resource used for Combat Abilities. Abilities can then build the stun needed for executions, which temporarily strengthen your melee damage. Keeping those actions connected gives each part of the kit a job.
Use an ability when it creates a useful opening, return to melee when that opening is safe, and take executions when they become available. Holding a full resource bar through the whole fight wastes the recovery your next hits could provide. Equally, emptying it without a target or follow-up leaves you with fewer options.
3. Read the damage legend before changing the whole build
Armor and shields need different answers. Check the damage information in Stats & Effects: blunt damage helps break armor, sharp damage counters shields, and fire is useful against Mold. Inspect the damage type on a weapon form or ability before judging it by its headline damage alone.
An armored Mold enemy is a useful example. You may want blunt damage for the outer armor and a different attack once that protection is gone. One form struggling with a particular layer does not mean the entire loadout needs a reset.
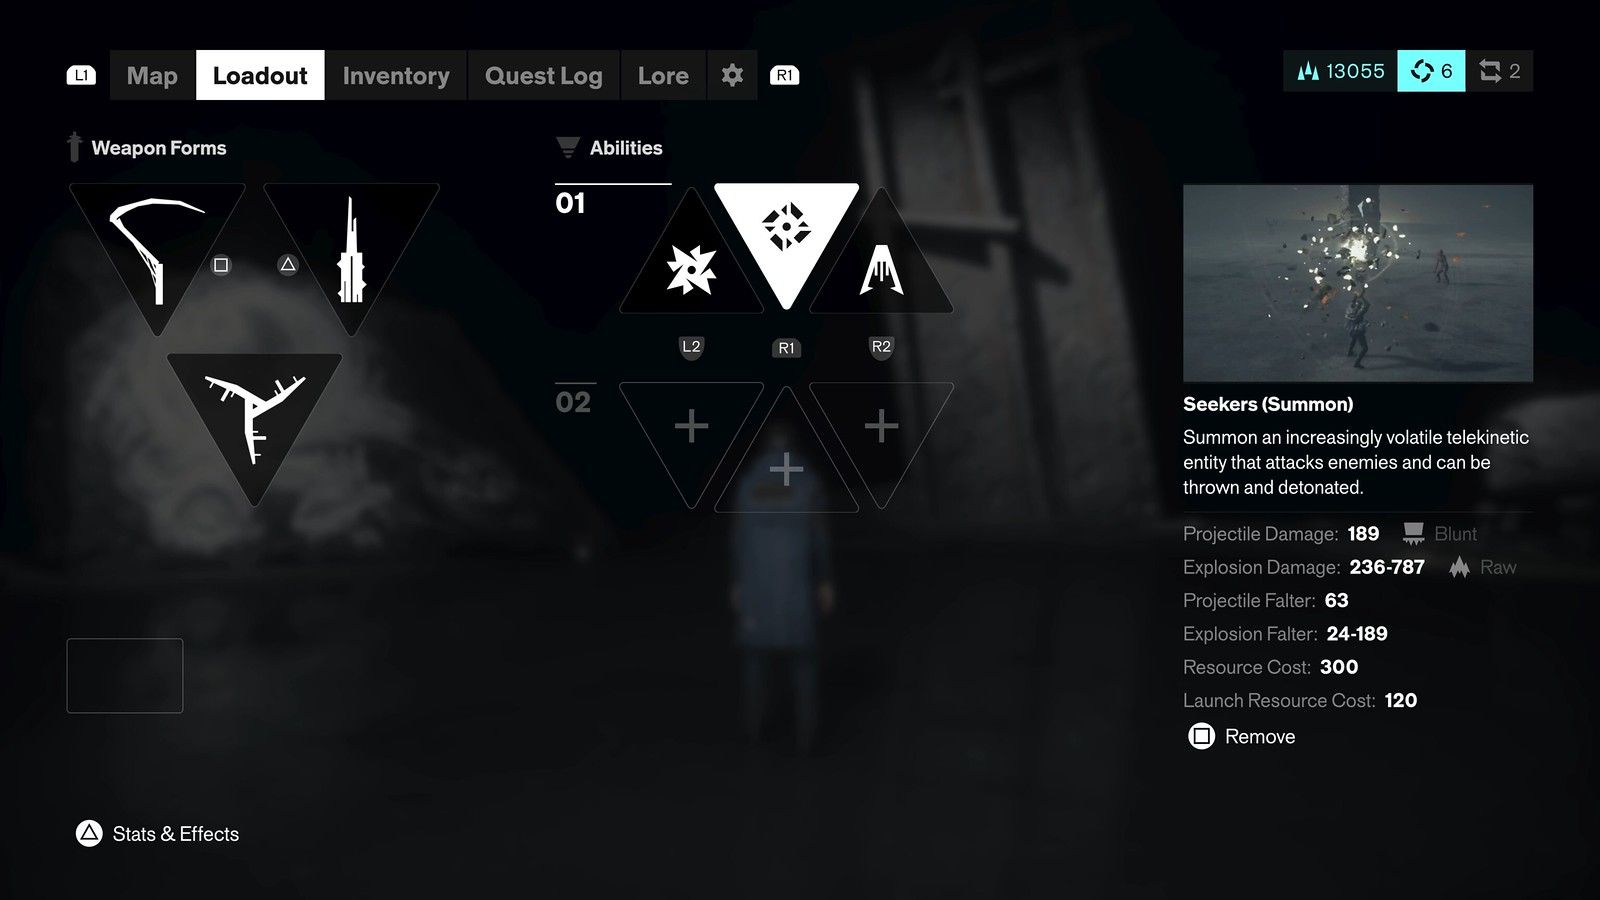
Before leaving the Gap
4. Test a newly earned ability before committing
After a Resonant boss, the visit to the Gap lets you try the new ability options before leaving. Use that opportunity to compare how they work with your existing attacks. A move that looks impressive may be awkward at the distance where you usually fight.
This trial is tied to that post-boss choice. It does not mean every later visit offers a free ability reset. Once you leave and commit, changing the selection involves the reset system. Try the alternatives while the choice is still open.
5. Check what an unused weapon form adds
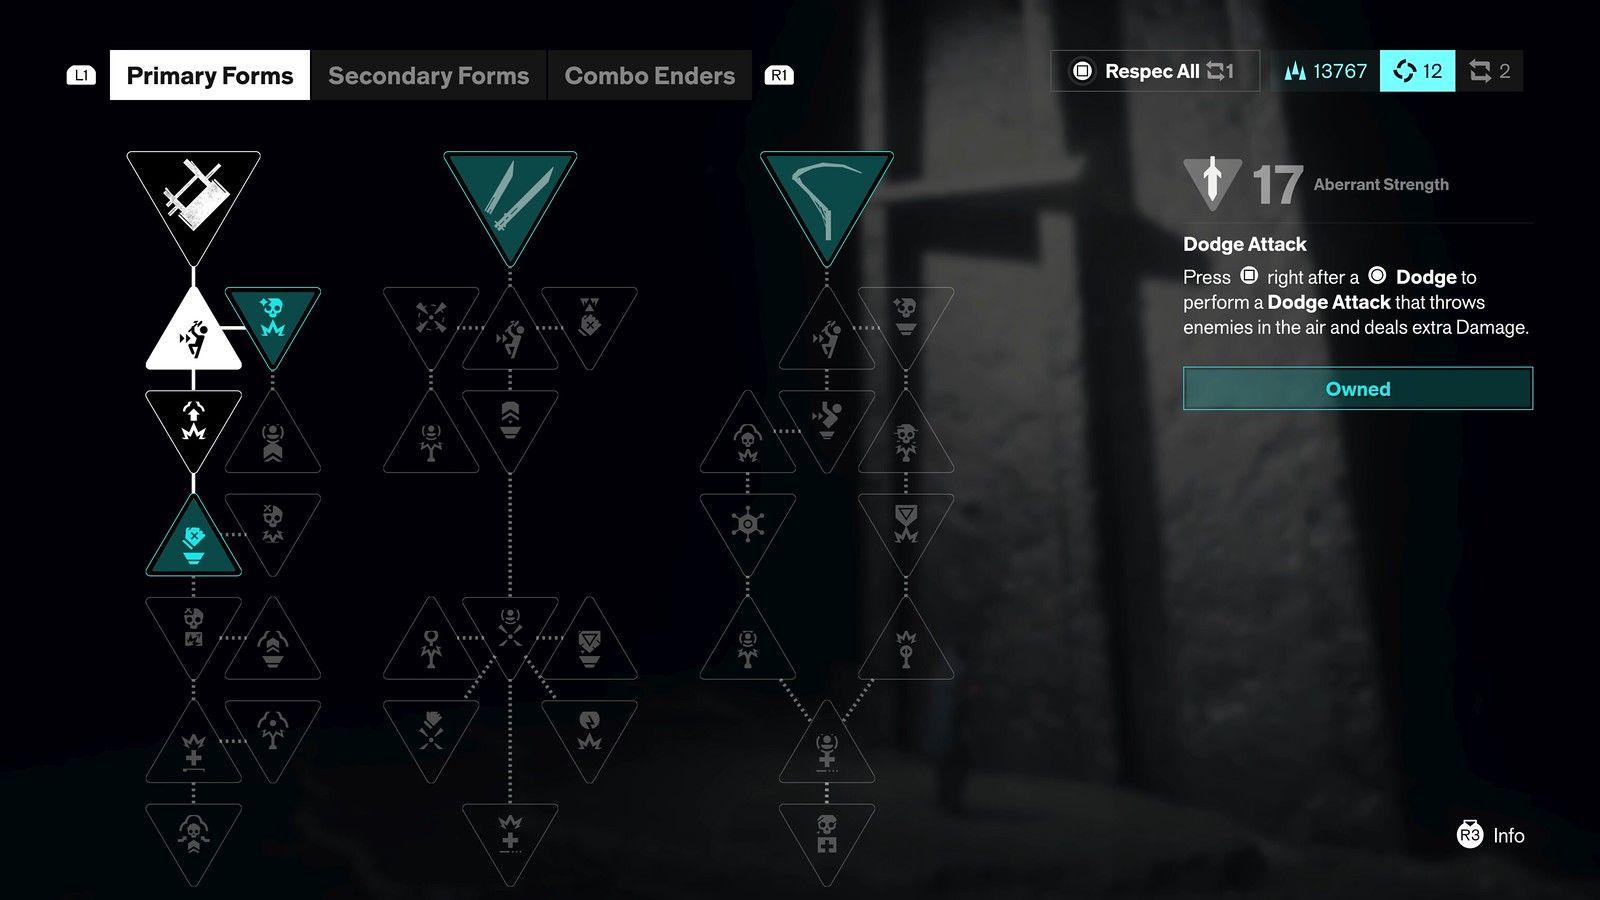
Opening another weapon form can raise Aberrant Strength even if you continue fighting with your preferred form. Read the unlock's stat change instead of dismissing an entire branch because you dislike its moveset.
That gives spare Living Shards a purpose beyond replacing your current weapon. It is still a spending decision: compare the benefit with the upgrade you are saving for, and avoid buying vendor materials without a specific use. Keep enough Source for the purchase you actually need.
On the way to the next objective
6. Follow Jesse's signals to Faults
Listen when Jesse's voice draws attention to the area and look for the large, distorted projection associated with a nearby Fault. These encounters unlock traversal abilities, so they deserve attention before another lap around an obstacle you cannot yet cross.
You do not need to clear every side activity before continuing the story. Give a newly noticed Fault a higher priority than an arbitrary collectible detour, then use the movement option it awards to reconsider routes that were previously out of reach.
7. Look beside vendors for health upgrades
When you reach a vendor, inspect the nearby freezer chest as well as the shop menu. Health upgrade points can be easy to overlook if the entire visit consists of buying materials and leaving.
Make it a quick arrival check. These pickups contribute toward health increases, and collecting the available one now avoids returning solely for something sitting beside the merchant. One pickup is progress toward an upgrade, rather than a promise of an immediate health bar increase.

8. Adjust the setting behind the problem
Assist Mode separates issues that a single difficulty switch would bundle together. If perfect dodges are the sticking point, widen their timing window. If projectiles leave too little reaction time, lower their speed. Enemy aggression and incoming damage have separate controls too.
Change one setting, play another encounter, and judge the result before adjusting anything else. Remedy confirms that Assist Mode does not block trophies or achievements and can be changed during play. Use it to address the part that is stopping you from learning the rest of the combat.